
Here are some photos from the cabinet creation process.

This was the first baffle board I made for the speaker. I wanted to incorporate a threaded mic clip mount directly on the baffle so a mic could easily be placed for performances or recording.
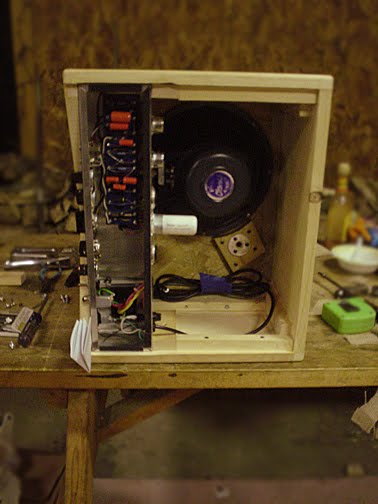
On my first baffle, I placed the speaker hole just a little bit too high, causing the magnet on the rear of the speaker to interfere with the working on the back of the amp. In the above photo, I have just clamped it in place to test.
Here is a sequence showing the 2nd baffle being covered by burlap. Since I chose to leave the amp unfinished/uncovered (other than some clear polyurethane), I wanted to use something simple and natural for the grill cloth. After a local search failed to produced some old coffee or feed sacks, I purchased some plain brown burlap.

I began by cutting two pieces of burlap and stapling along just one edge. Burlap is very sound-permeable, so two thicknesses should be more durable.


After one side was completely secured, I attached the other side to a scrap strip of wood, leaving plenty of extra. This allowed me to pull all the slack out uniformly from the original side I stapled.

Once all the slack was pulled out, I stapled across the other side, keeping it all taut. Then I cut off the extra and secured both remaining sides.

Bolting in the speaker.

To keep the front grill free of screw holes, bolts, etc., I attached the baffle to the amp cabinet from the rear. I just ran some wood screws in from the rear and that pulled the baffle right up against the baffle support strips.

Baffle board installed.

Baffle board installed.


Rear panel covers installed.
The finished product came out as good as I could have hoped. As usual, there were a few trials-and-errors along the way, but it looks and performs great.

This was the first baffle board I made for the speaker. I wanted to incorporate a threaded mic clip mount directly on the baffle so a mic could easily be placed for performances or recording.
On my first baffle, I placed the speaker hole just a little bit too high, causing the magnet on the rear of the speaker to interfere with the working on the back of the amp. In the above photo, I have just clamped it in place to test.
Here is a sequence showing the 2nd baffle being covered by burlap. Since I chose to leave the amp unfinished/uncovered (other than some clear polyurethane), I wanted to use something simple and natural for the grill cloth. After a local search failed to produced some old coffee or feed sacks, I purchased some plain brown burlap.

I began by cutting two pieces of burlap and stapling along just one edge. Burlap is very sound-permeable, so two thicknesses should be more durable.


After one side was completely secured, I attached the other side to a scrap strip of wood, leaving plenty of extra. This allowed me to pull all the slack out uniformly from the original side I stapled.

Once all the slack was pulled out, I stapled across the other side, keeping it all taut. Then I cut off the extra and secured both remaining sides.

Bolting in the speaker.

To keep the front grill free of screw holes, bolts, etc., I attached the baffle to the amp cabinet from the rear. I just ran some wood screws in from the rear and that pulled the baffle right up against the baffle support strips.

Baffle board installed.

Baffle board installed.


Rear panel covers installed.
The finished product came out as good as I could have hoped. As usual, there were a few trials-and-errors along the way, but it looks and performs great.